Use OpenID Connect as part of your Shared Accounts Authentication method.
Step 1
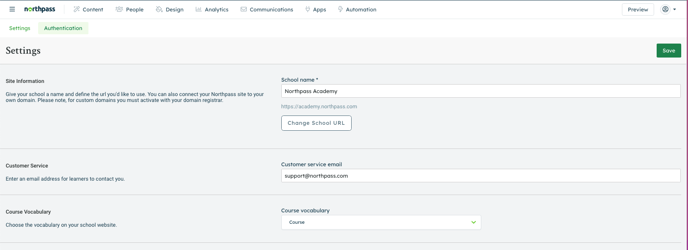
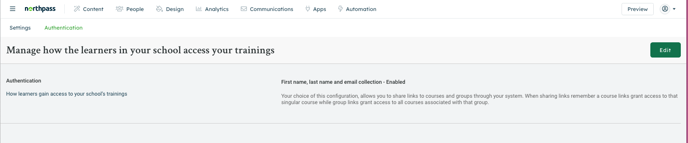
Click on Account in the top navigation bar and select School Settings and Click on the Authentication tab.
Step 2
Click Edit.
Step 3
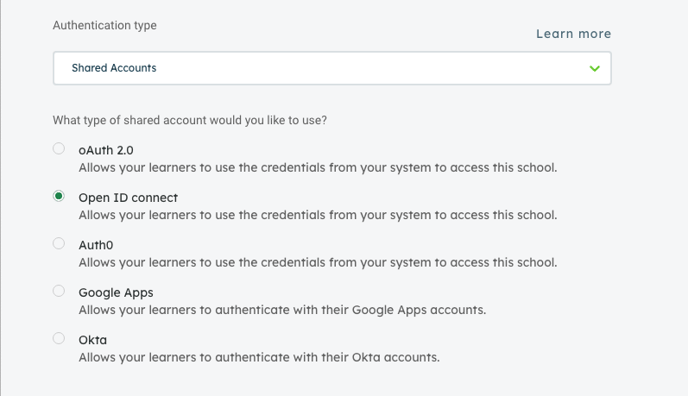
Select Shared Accounts from the dropdown.
Step 4
Select OpenID Connect. Enter the details for your OpenID Connect server.
User data
Northpass expects that in the response from the token endpoint the ID token will be returned, containing encoded data about the user. This data will be later used to create the user on our platform.
Sample data encoded in ID token:
{
"sub": "1234",
"name": "NAME",
"email": "EMAIL",
"preferred_username": "NICKNAME",
"given_name": "FIRST_NAME",
"family_name": "LAST_NAME",
"lms": {
"groups": [
"GROUP_1", "GROUP_2"
]
}
}
Important note: for the login process to be successful, not all the data presented in the sample data is necessary. The most important thing is that the sub value will appear that will allow us to identify the user in our system.
What will happen based on the data encoded in the ID token:
-
If the user logs in to the Northpass application for the first time, an account will be created for him, supplemented with the data from the ID token, and the user will be logged in.
-
If in the ID token there will be namespace "lms" with the key "groups", then the user will be automatically added to these groups and enrolled to all courses in a given group (this will happen only if the group already exists in Northpass).
Step 5
Enter a URL that you’d like the learner to be redirected to when they click “Log Out” from your school website. Next, enter your company website.
Step 6 (Optional)
Choose a default group. If a default group is selected, then all learners who access the school will be added into the default group and gain access to the courses within the default group. Click here to learn more about managing course access.
Step 7
Click Save.
Get started sharing links to your school. Anyone with an account in your system will be able to authenticate upon visiting your school. Learners will only see the courses that they have been granted access to.