Organize your learners with Groups allows you to assign a subset of learners to one or more courses and better analyze school data.
Groups are used to organize your learners and be able to specify permissions to the learners in each group.
You need all your ingredients before you start cooking, and similarly, you need all learners, courses, and/or learning paths that you would like to include within the group before performing the steps outlined below.
Step 1
Working in the People tab, select Groups. Click Add at the right.

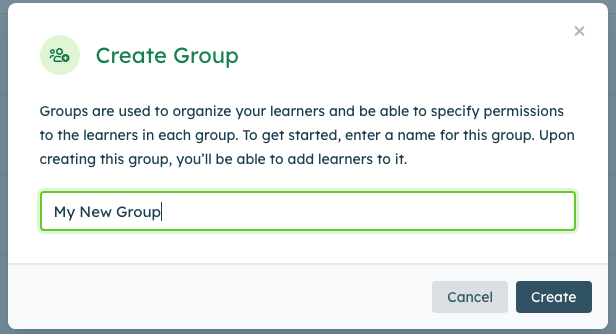
Step 2
Enter a name for your group. Click Create.
Step 3
Once the group has been successfully created, you can add learners, courses, and/or learning paths (if enabled) to a group.

Step 4
Add learners to the group by clicking Add Learners from the drop-down menu identified above. Begin to type the name of the learner & select their name. Once you have selected all preferred learners, click the Add button in the upper-right-hand corner.
Add courses to the group by clicking Add Courses from the same drop-down menu. Begin to type the name of the course & select the course. Once you have selected all preferred courses, click the Add button in the upper-right-hand corner.
Note: ALL learners in the group will receive access to the course assigned to the group.
Step 5
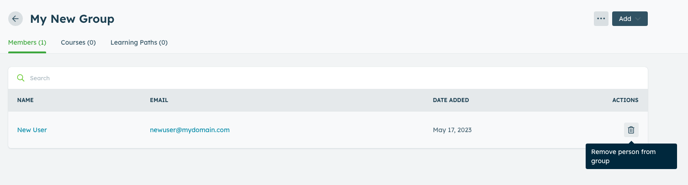
You can see an overview of all the learners, courses, & learning paths associated with the group on the group overview page. Each characteristic can be clicked on to easily identify all learners, courses, & learning paths included within the group.
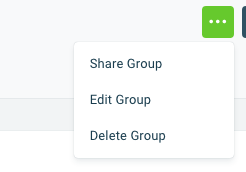
Once we've created our Group, we have a few options to work with from the Actions icon: Share Group Link, Edit, and Delete.
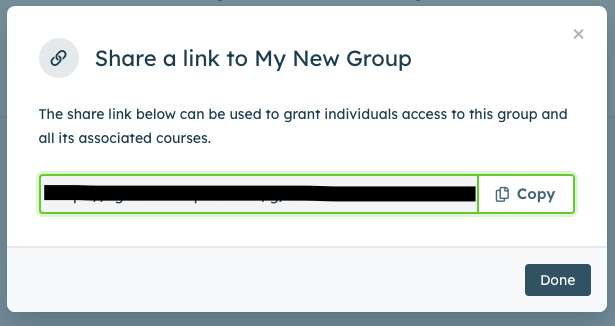
Share Group:
Shares a link with existing learners so that they can click to enroll in a group of pre-selected courses.
Note: If you are using the pre-registration authentication type, these links will not work for individuals who are not existing learners within your school. As a result, you will need to add the learner to your school and they will need to activate their account before utilizing the course enrollment link. This feature will not allow new learners to create an account in order to access a course via the link.
-
If you are using URL Authentication, you may choose to customize the URL to pre-populate the learner's information so they can bypass the login page and access the courses directly.
-
Depending on your authentication flow, there will be specific instructions provided beneath the URLs to inform you on how to customize your URL. This is an optional step unless you are using UIDs to identify your learners.
-
If you are using UIDs, you must pre-populate the URL with the learner's UID in order for the learner to be able to access the courses.
Deleting or Editing a Group:
Step 1
Click on the Group you wish to rename or delete.
Step 2
Click the Actions Icon at the right of your selected Group. To rename, click Edit where you will be prompted to rename the Group. Click Delete to permanently delete the group. Changes are saved automatically.
Deleting a Learner or Course:
Step 1
Click on the Group you wish to work with.
Step 2
Click the Actions icon at the right of the selected learner or Course, click Delete.