Streamline workflows with learner progress, creation, and course completion events to trigger specific actions within your systems.
Webhooks enable your developers to build deeper integrations with Northpass that enable your systems to take action based on learner interactions with training.
In order to use webhooks, you need to be on Premium package or higher.
Let's walk through how to enable the Webhooks app to set up endpoints to receive webhooks.
Step 1
Find the Apps tab from the top navigation bar and the Add-ons tab from the sub navigation bar. Look for the below icon for the Webhooks app, and click Webhooks.
Step 2
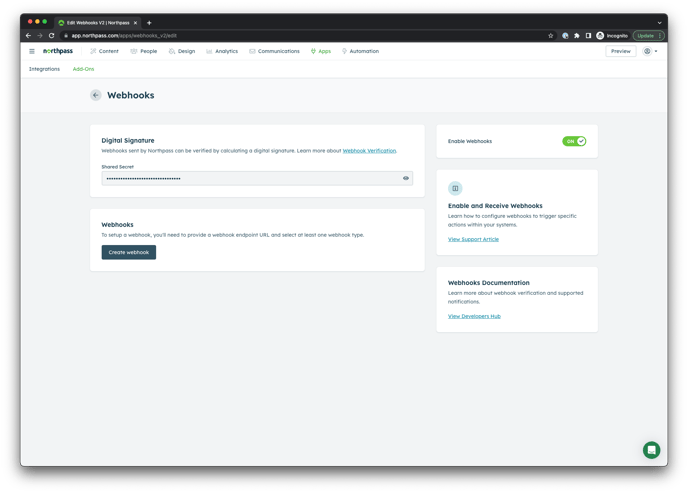
Enable the application using the toggle.
Step 3
Next, you can enter a URL endpoint that has been set up to receive webhooks. Additionally, you can subscribe this endpoint to receive any of our available webhook types (learner created, person invited, etc).
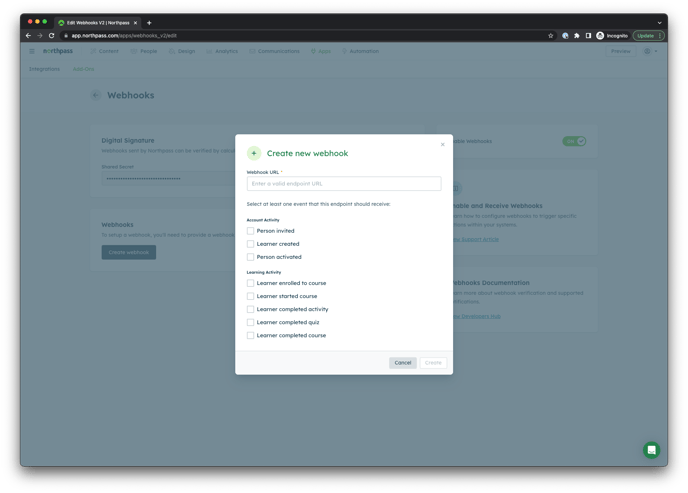
Using the "Create webhook" button, you can create additional subscriptions, but you will be limited to a maximum of 10 webhook subscriptions.
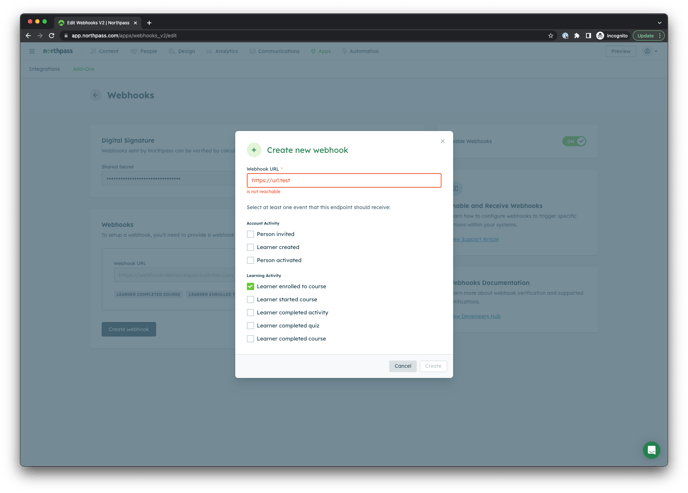
In order to successfully create a webhook subscription, the specified URL endpoint must return a 2xx code. If the URL does not return a valid 2xx code, you will see the following *is not reachable error:
Step 4
The specified webhooks will now begin sending to their respective URL endpoints. To learn more about the various webhook types that we offer, check out the Webhooks Guides in our Developer Hub.
Note: If a webhook fails to be delivered successfully, it will continue re-trying every hour for 24 hours, or until it succeeds. If the webhook still does not succeed after 24 hours, all webhooks will be disabled and you will be notified.